Network Topology
How to Set Up Your Network Page
The Network page lets you map how devices connect — visually and logically.
It’s especially useful for planning infrastructure, assigning parent-child relationships, and spotting gaps.
To get started, you’ll need to define at least one root node and mark certain devices as network nodes (like Switches or Routers).
Start by creating a root device with the MAC address Internet, if the application didn’t create one already.
This special MAC address (Internet) is required for the root network node — no other value is currently supported.
Set its Type to a valid network type — such as Router or Gateway.
Tip
If you don’t have one, use the Create new device button on the Devices page to add a root device.
⚡ Quick Setup
- Open the device you want to use as a network node (e.g. a Switch).
- Set its Type to one of the following:
AP,Firewall,Gateway,PLC,Powerline,Router,Switch,USB LAN Adapter,USB WIFI Adapter,WLAN
(Or add custom types under Settings → General →NETWORK_DEVICE_TYPES.) - Save the device.
- Go to the Network page — supported device types will appear as tabs.
- Use the Assign button to connect unassigned devices to a network node.
- If the Port is
0or empty, a Wi-Fi icon is shown. Otherwise, an Ethernet icon appears.
Note
Use bulk editing with CSV Export to fix Internet root assignments or update many devices at once.
Example: Setting up a raspberrypi as a Switch
Let’s walk through setting up a device named raspberrypi to act as a network Switch that other devices connect through.
1. Set Device Type and Parent
- Go to the Devices page
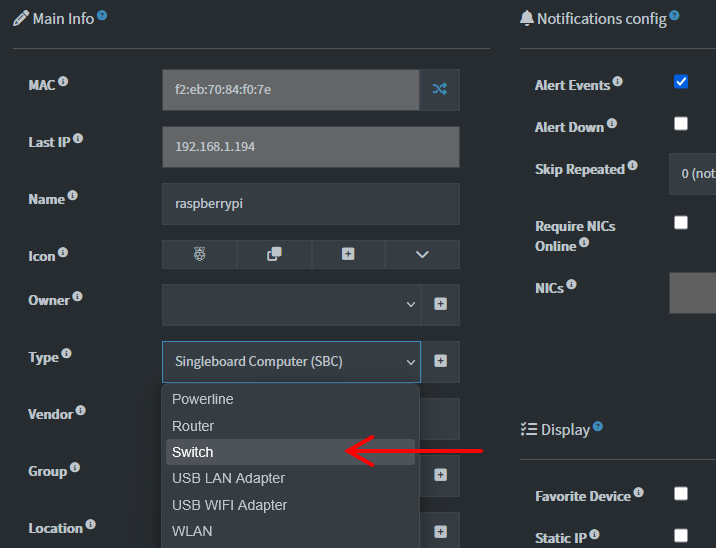
- Open the device detail view for
raspberrypi - In the Type dropdown, select
Switch
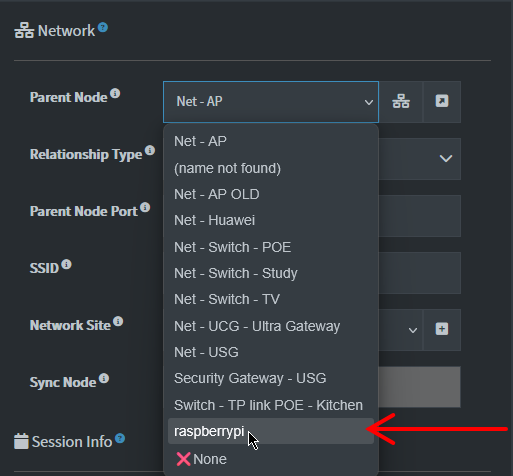
- Optionally assign a Parent Node (where this device connects to) and the Relationship type of the connection.
Thenicrelationship type can affect parent notifications — see the setting description and Notifications documentation for more.

Note
Only certain device types can act as network nodes:
AP, Firewall, Gateway, Hypervisor, PLC, Powerline, Router, Switch, USB LAN Adapter, USB WIFI Adapter, WLAN
You can add custom types via the NETWORK_DEVICE_TYPES setting.
- Click Save
2. Confirm The Device Appears as a Network Node
You can confirm that raspberrypi now acts as a network device in two places:
- Navigate to a different device and verify that
raspberrypinow appears as an option for a Parent Node:
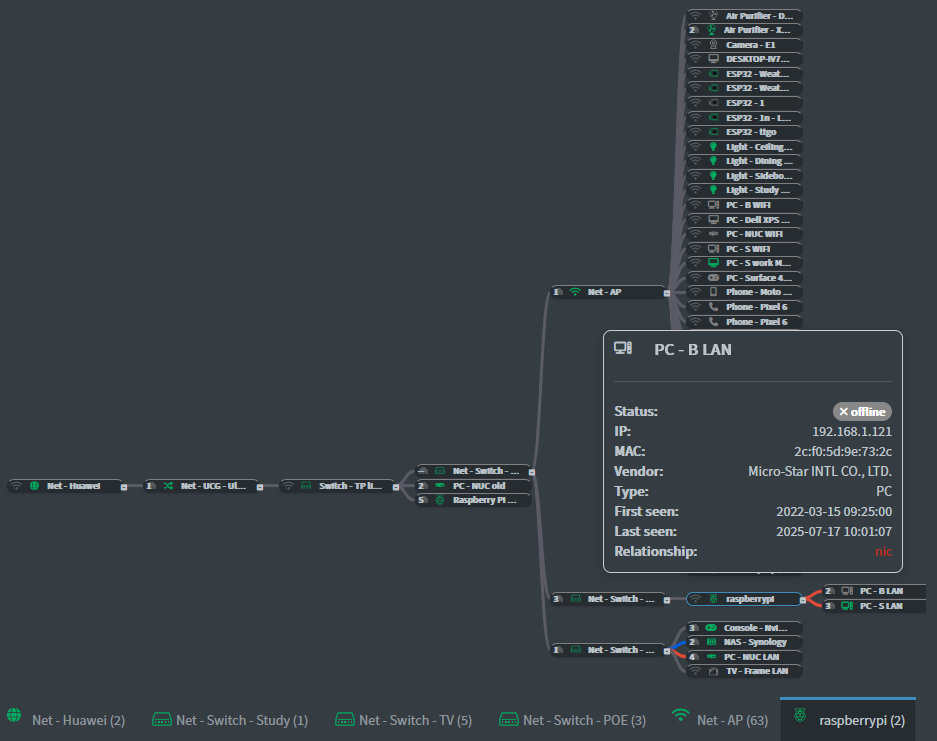
- Go to the Network page — you'll now see a
raspberrypitab, meaning it's recognized as a network node (Switch):
- You can now assign other devices to it.
3. Assign Connected Devices
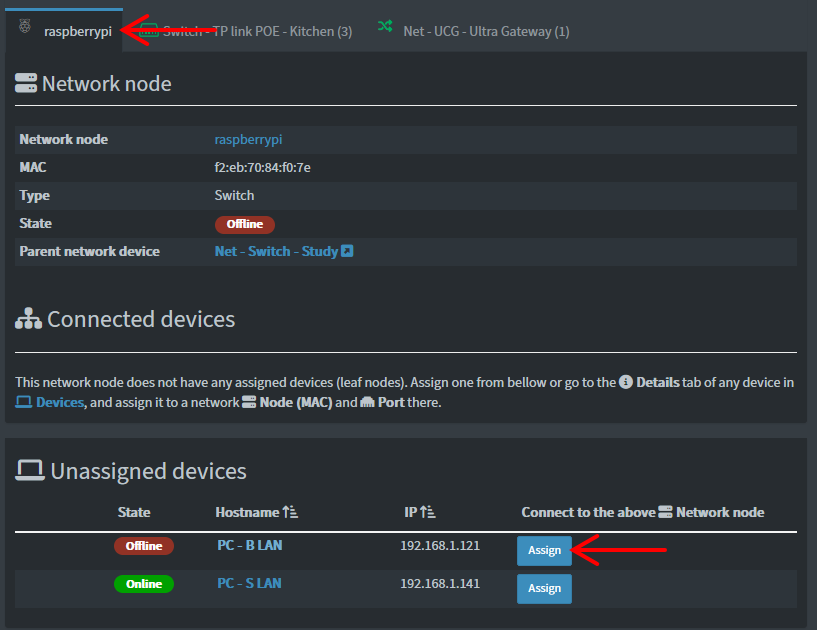
- Use the Assign button to link other devices (e.g. PCs) to
raspberrypi. - After assigning, connected devices will appear beneath the
raspberrypiswitch node.
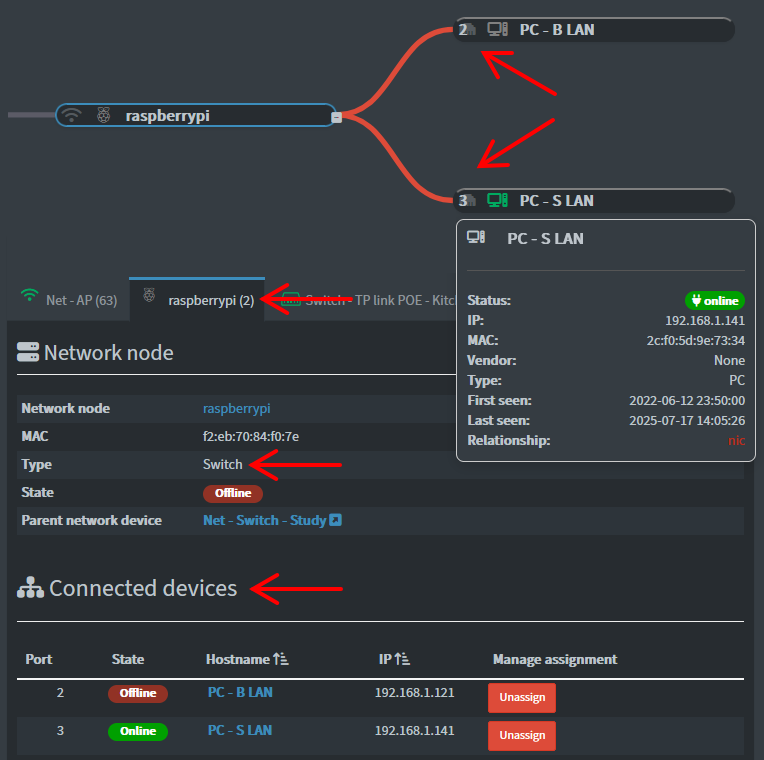
- Relationship lines may vary in color based on the selected Relationship type. These are editable on the device details page where you can also assign a parent node.
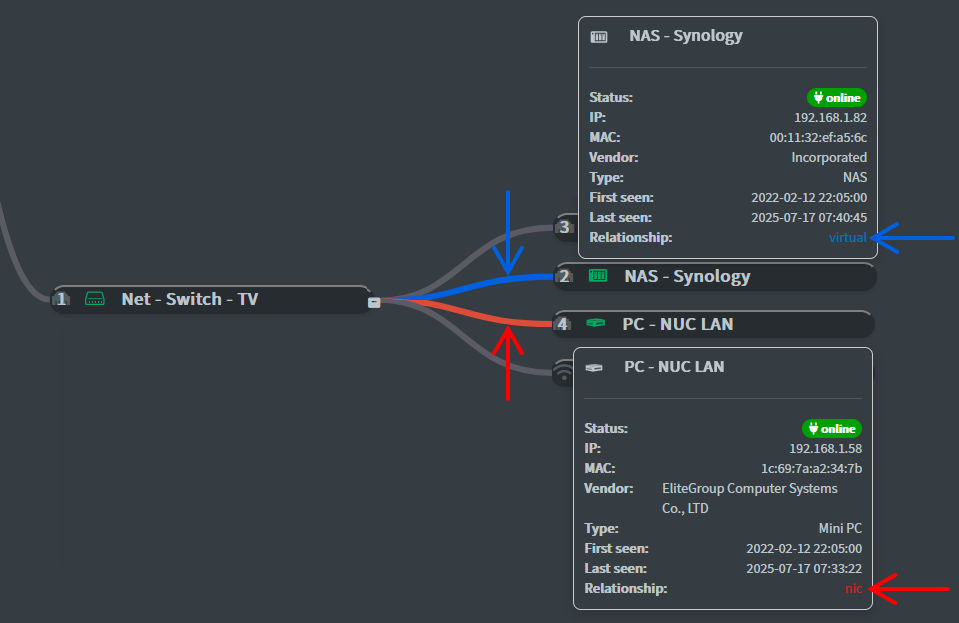
Hovering over devices in the tree reveals connection details and tooltips for quick inspection.
✅ Summary
To configure devices on the Network page:
- Ensure a device with MAC
Internetis set up as the root - Assign valid Type values to switches, routers, and other supported nodes that represent network devices
- Use the Assign button to connect devices logically to their parent node
Need to reset or undo changes? Use backups or bulk editing to manage devices at scale. You can also automate device assignment with Workflows.